Navigating Data Source Connections in Adriel: A Step-by-Step Instructional Guide and Pro-Tips
Pro-tips to know before getting started:
- Admin Access: Ensure that the individual setting up the data connection holds administrative privileges within the desired data source account.
- Establishing data source connections does not require an Adriel user log-in. You can share a link with the authorized user holding the necessary permissions solely for connecting that specific data source.
This link provides access exclusively to the data source connection page. Find and copy the link visible beneath the search bar, as illustrated in the referenced image below.
- Establishing data source connections does not require an Adriel user log-in. You can share a link with the authorized user holding the necessary permissions solely for connecting that specific data source.
- Encountering connectors marked by a crown icon (as shown in the image below) signifies premium connectors. If you need to connect a premium connector, go through the steps listed below.
In order to complete the connection, reach out to your dedicated Customer Success Manager or utilize the Chat Box (located at the bottom right of the screen) and share a CSV file with the specified dimensions and metrics you're looking to visualize in Adriel.
- If you do not see the connection you're looking for, please contact your dedicated Customer Success Manager or utilize the Chat Box to share the details of the platform you're looking to connect to. Even without a direct API connection, we can get the data you need into Adriel through CSV upload, Google Spreadsheet integration, or integration with your data warehouse.
Upon request, we can customize additional API connections for an added fee.
Step-by-step guide:
Step 1: After logging into Adriel, locate and click on the "Connections" icon situated on the left-hand navigation bar.

Step 2: Navigate to the search bar and input the name of your desired connection type into the "search for a data source" field.

Step 3: Select the appropriate data source from the drop-down list.

Step 4: A panel will appear on the right-hand side. Complete the necessary fields, noting that these requirements can differ across connections. Upon filling in the fields, proceed by clicking "submit" at the bottom right.
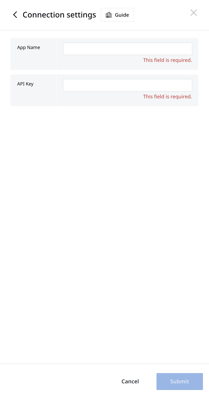
Note: Some connections may provide a connection guide within this panel for added assistance. Refer to the image below for visual guidance.
Reminder: The user connecting the data source must be an admin to successfully complete the connection.
Step 5: Upon successful data source connection, it will appear in the "Connected data sources" section situated below the search bar on the Connections page.
Note: Multiple accounts from the same data source can be connected, however, they are categorized as 1 connector per account when referencing payment plan terms.
Data propagation begins instantly, yet it might take a brief period (usually < 1 hour) before displaying on your dashboards.

If you require additional help with data source connections, please contact Adriel Support in the chat box.