-
Getting Started with Adriel BI
-
Data Source Hub
- Overview: Connecting Data Sources
- Integrate - Advertising Portals
- Flexible Integrations - File Sharing / Data Base
- Adform
- Airbridge
- Amazon Ad Server (Sizmek)
- Amazon Ads
- Amazon DSP
- Amplitude
- Apple Search Ads
- AppsFlyer
- Awin
- Basis
- Branch
- Buzzvil
- Cafe24
- Coupang
- Criteo
- eTracker
- Facebook Page Organic
- Godomall
- Google Ads
- Google Ad Manager (GAM)
- Google Analytics 4 (GA4)
- Google Business Profile (GBP)
- Google Campaign Manager 360 (CM360)
- Google Display & Video 360 (DV360)
- Google Search Console (GSC)
- Google Sheets
- HubSpot
- Instagram Organic
- Instagram Public
- Kakao
- Klaviyo
- LinkedIn Ads
- LinkedIn Organic
- Mailchimp
- Matomo
- Meta Ads (formerly Facebook Ads)
- Microsoft (Bing) Ads
- Mobon
- Moloco
- Naver
- Outbrain
- Pinterest Ads
- Quantcast
- Quora Ads
- Reddit Public
- Salesforce Reporting
- Semrush
- Shopee
- Shopify
- Singular
- Sistrix
- Snapchat Ads
- Spotify Ads
- StackAdapt
- Taboola
- Targeting Gates
- Teads
- TikTok Ads
- TikTok Organic
- TikTok Public
- Unity Ads
- Walmart Connect
- WooCommerce
- X (Twitter) Ads
- X (Twitter) Organic
- Yahoo Ads
- Yahoo DSP
- Yelp Ads
- YouTube Analytics
- YouTube Public
- The Trade Desk
- Active Campaign
- CallRail
- AppsFlyer Cohort
- Adjust
- Piano Analytics
-
Business Intelligence: Adriel Dashboard
-
Exploring Data Analysis Tools
-
Your Team
-
FAQ
How to connect Shopify to Adriel
Detailed instructions to help you set up the data source for Shopify
Lastly modified on: Thu, 20th May 2025 at 03:36 PM
Prerequisite
- Shopify store with admin access
Instructions
Step 1: Creating App and getting API token.
- Login to the Shopify account that you want to connect to Adriel.
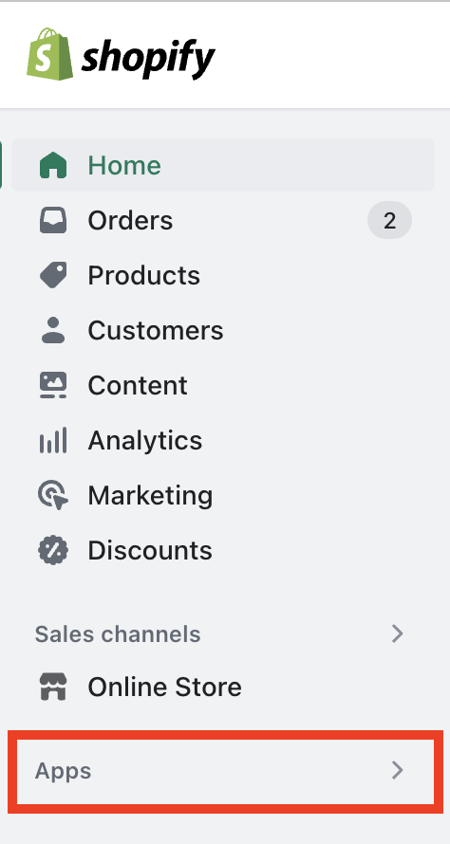
- Click “Apps” on the left menu.
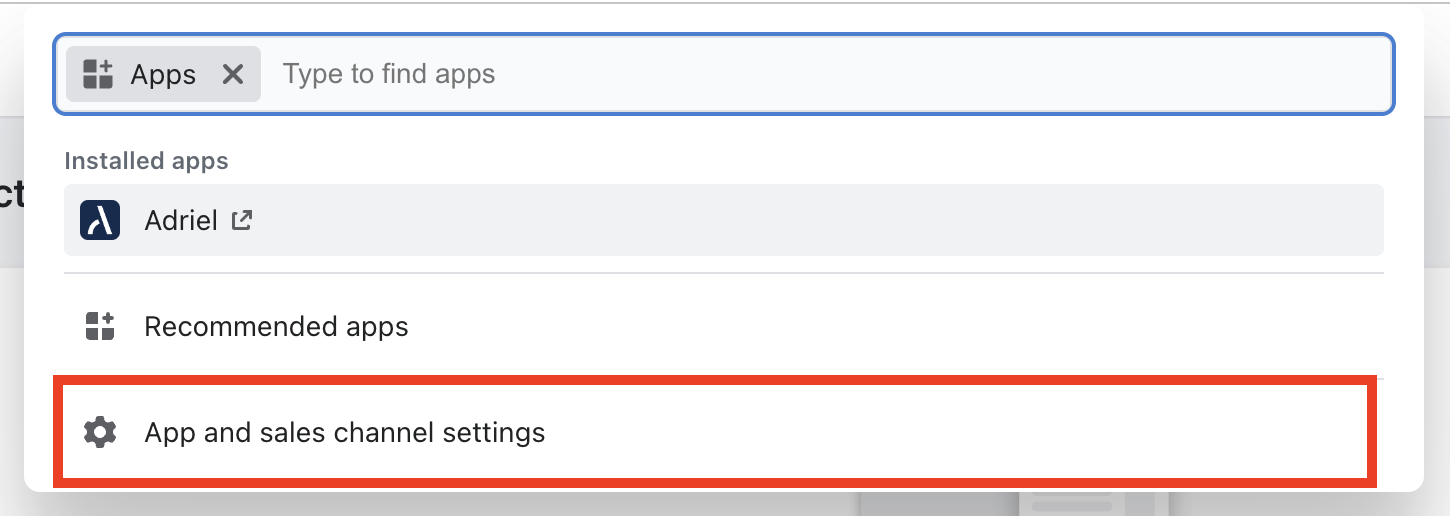
- Click "App and sales channel settings" to proceed.
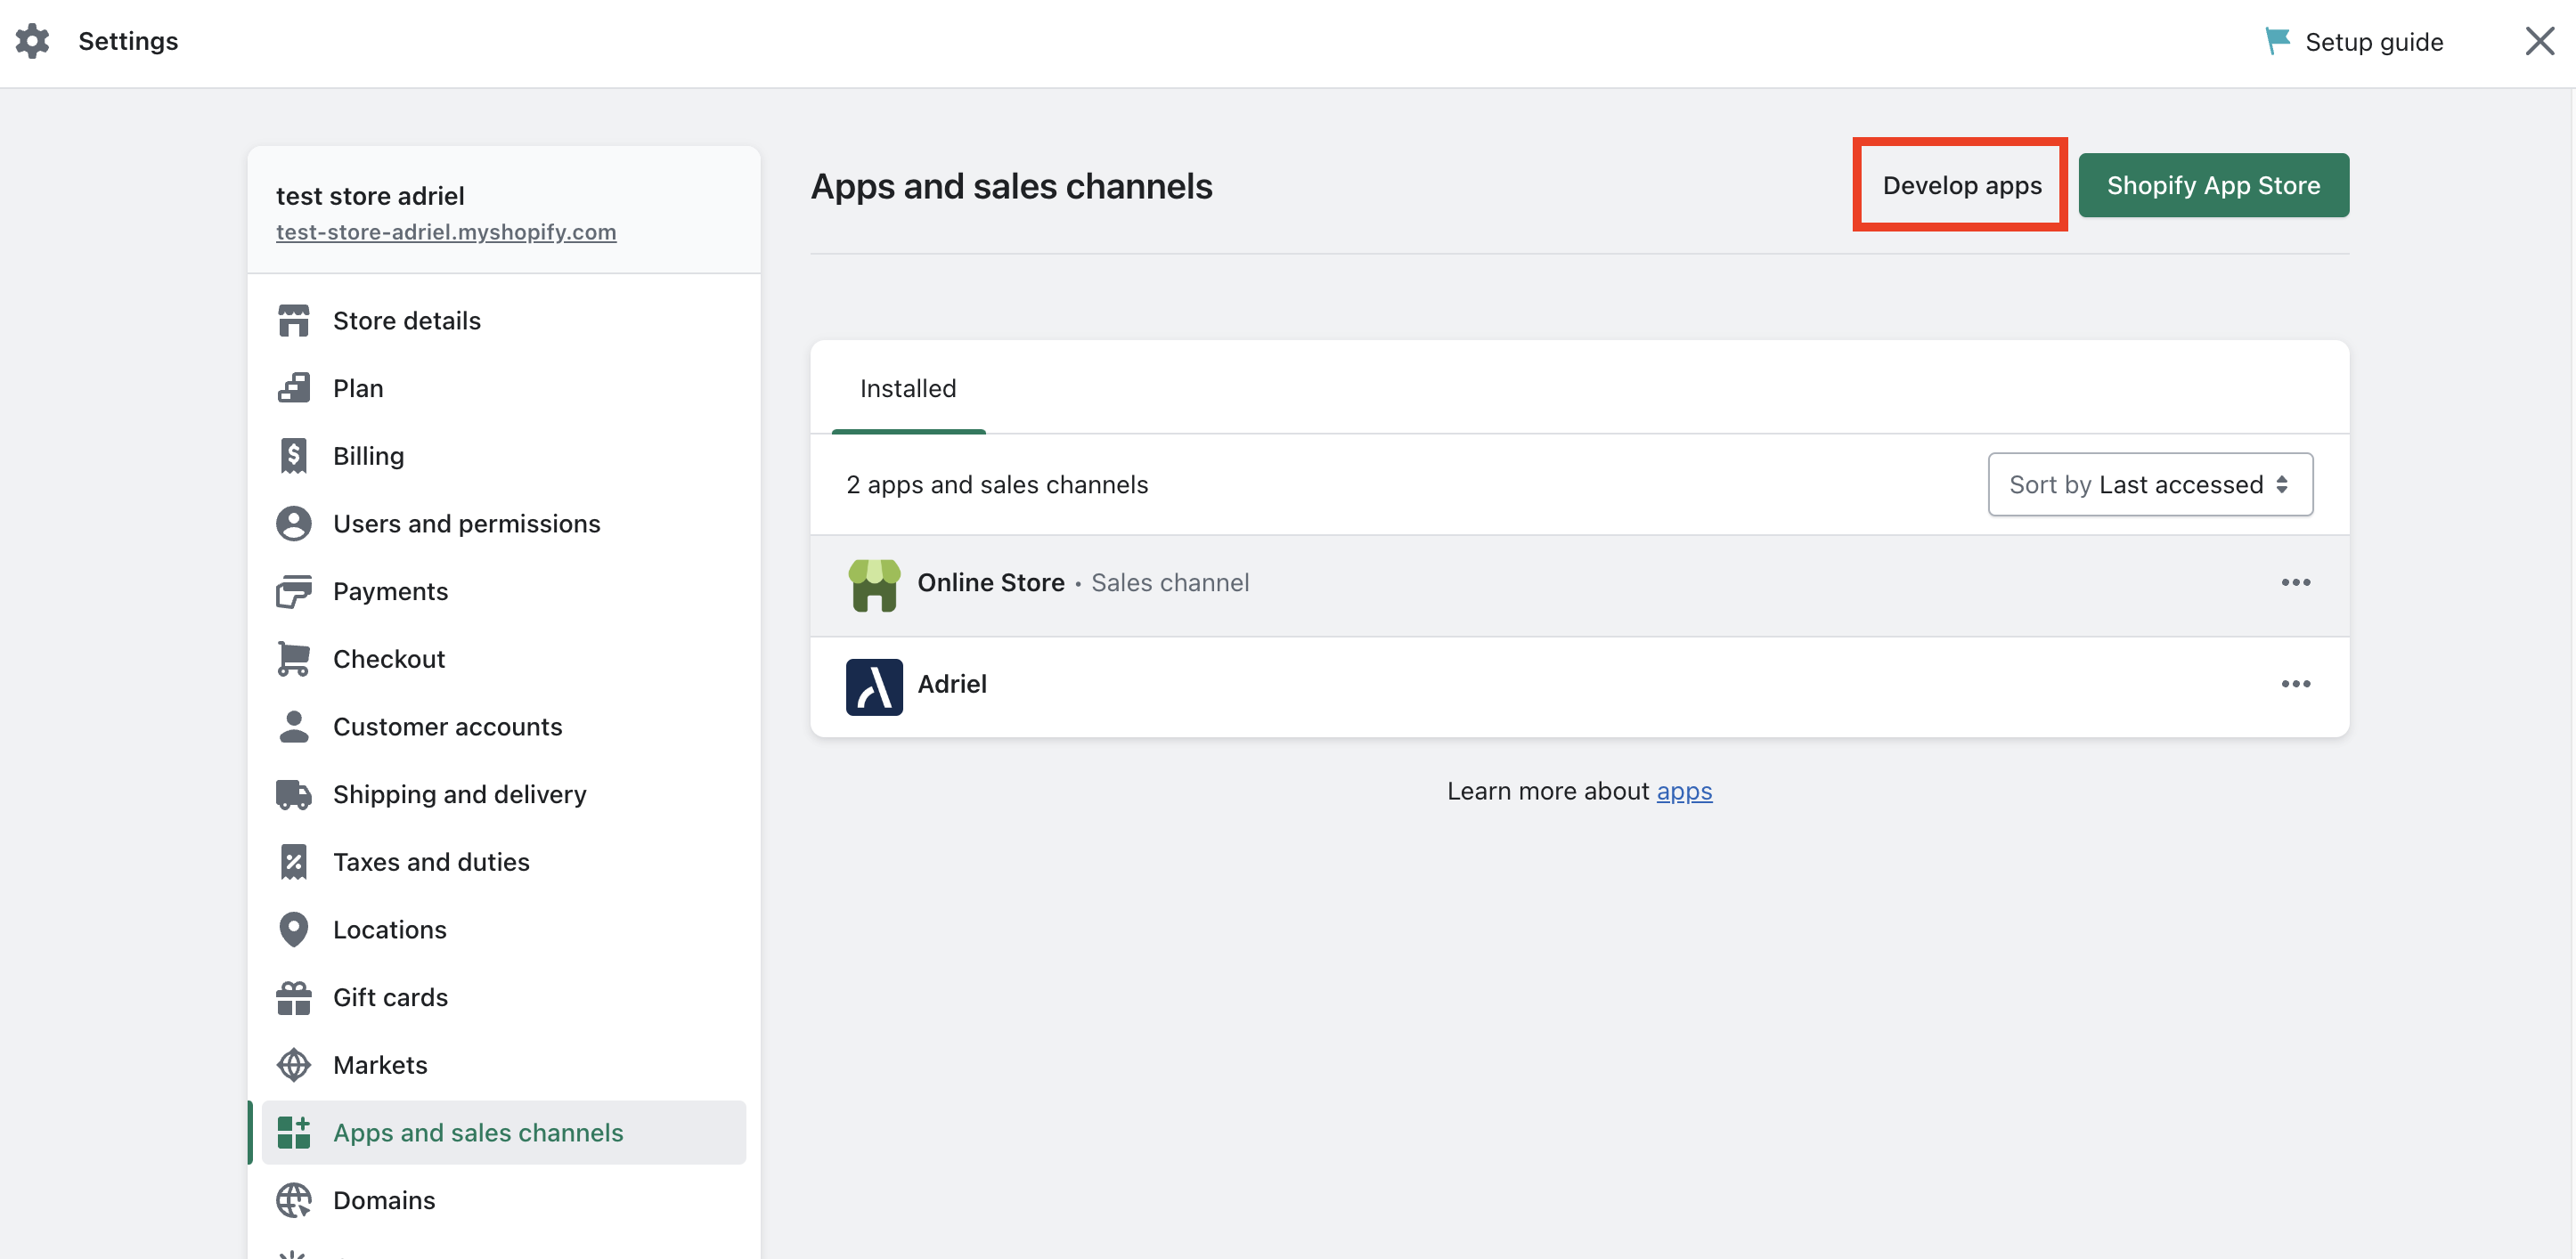
- Click the "Develop apps" at the upper right of the screen.
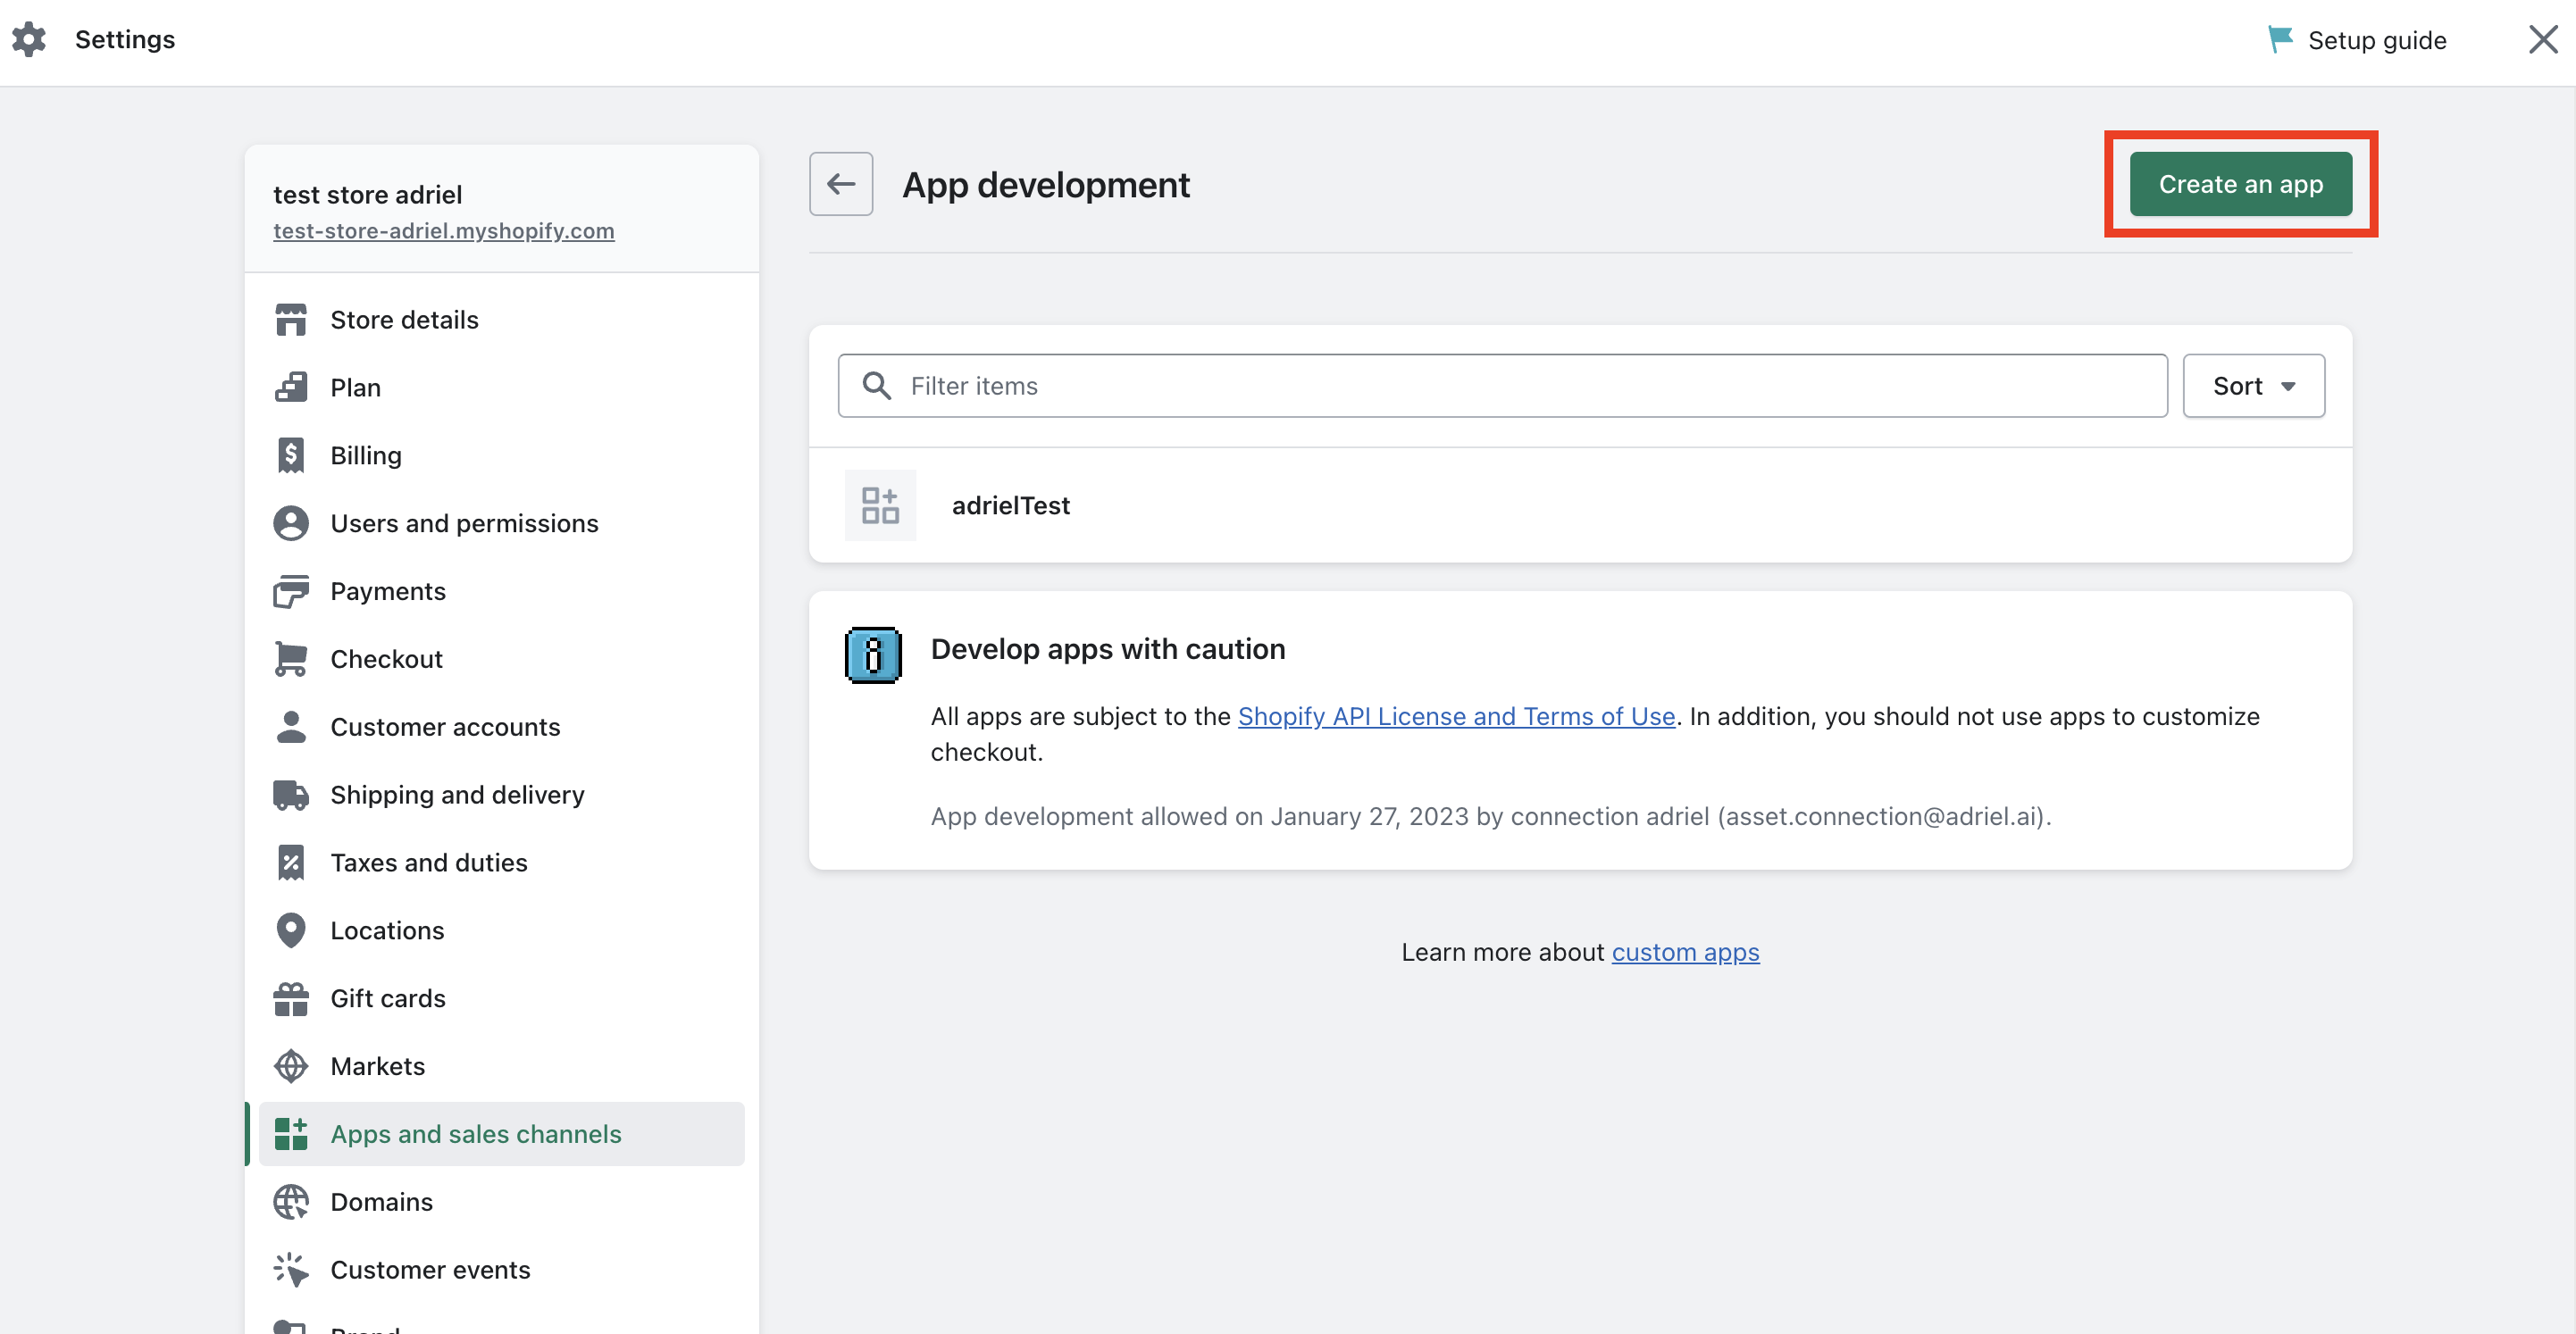
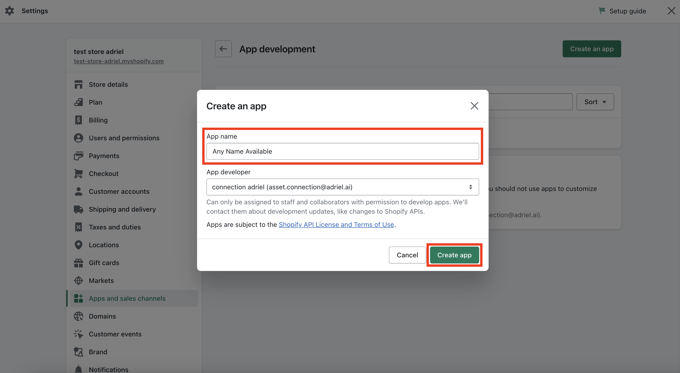
- Click "Create an app" at the upper right of the screen.
- Fill in an identifiable App name and click "Create app."
- Click "Configure Admin API Scopes" for further settings.
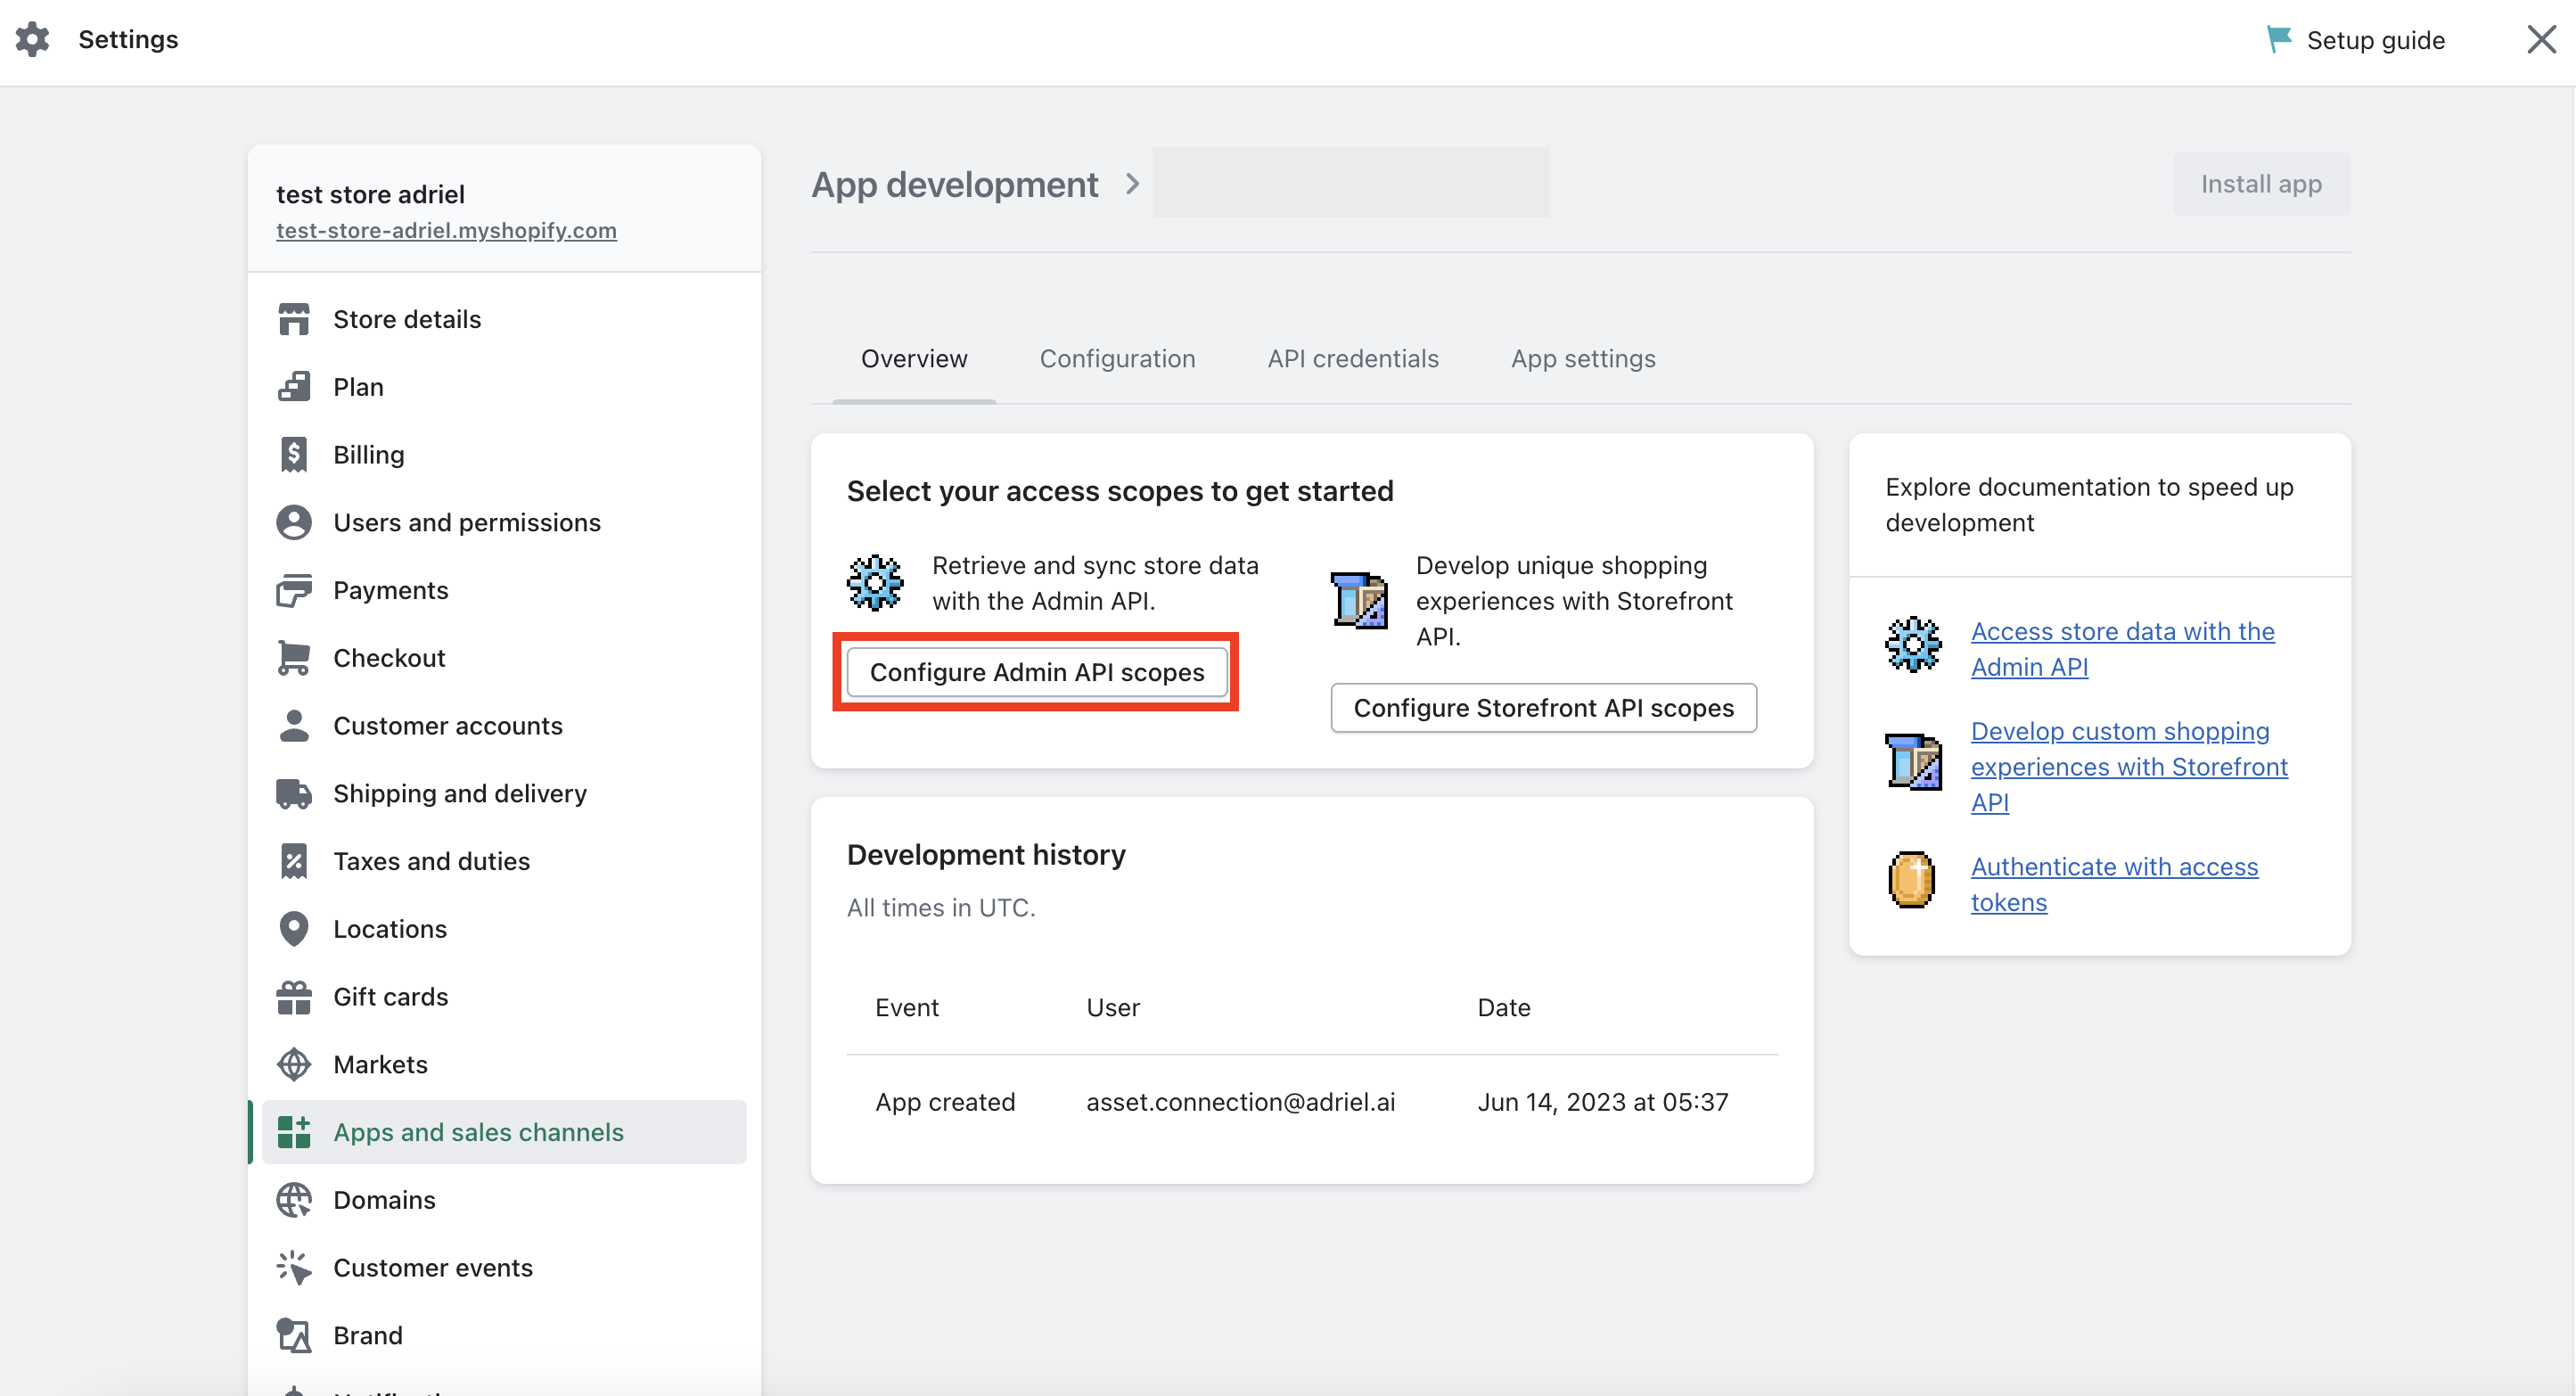
- Grant 4 scopes as below. Click "Save" at the upper right of the screen.
- "read_customers" - grant by checking the checkbox
- "read_inventory" - grant by checking the checkbox
- "read_orders" - grant by checking the checkbox
- "read_products" - grant by checking the checkbox
- Click "API credentials" > "Install app" to proceed.
If the app is already installed and only access scope changes were made as above, there is no additional installment needed.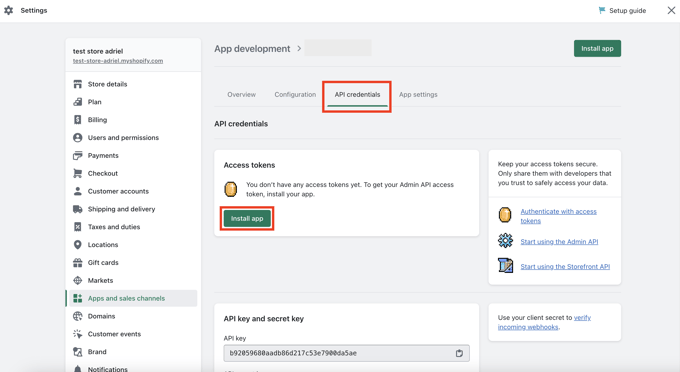
- After installation, generate and copy Admin API access token for Step 2.
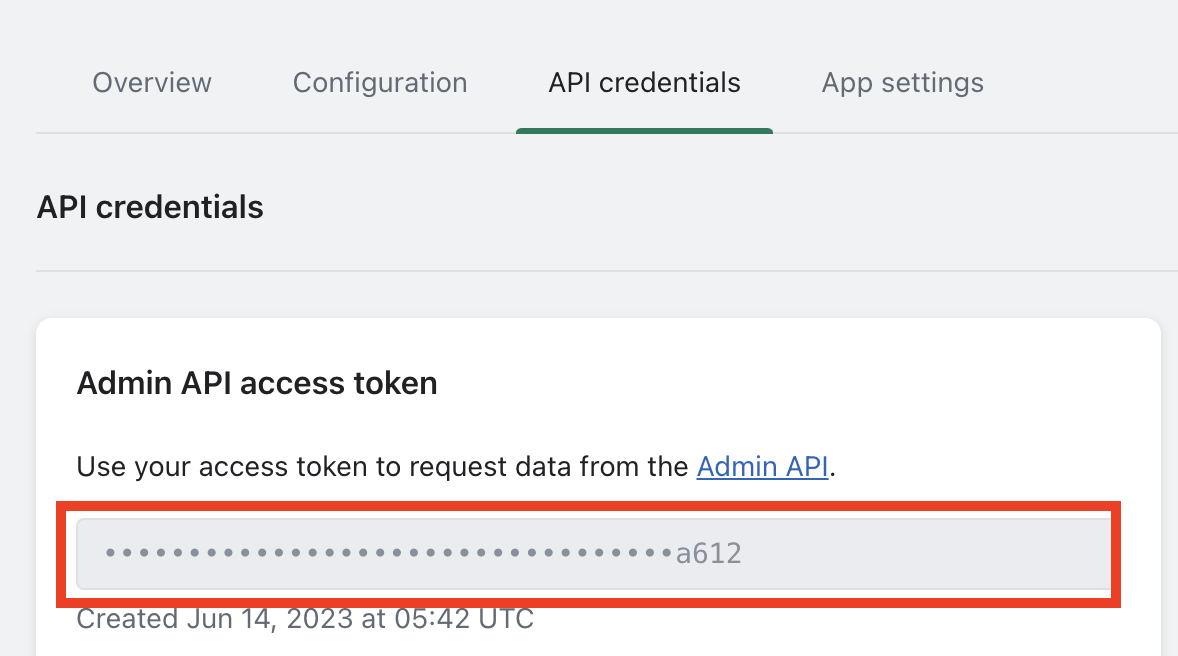
Step 2: Connecting Shopify to Adriel
- Move to Adriel’s Connections page.
- Type “Shopify” into the search bar.
- Fill in the two required fields.
– Shop name: last part of the admin setting URL.
Ex) https://admin.shopify.com/store/test-store-adriel/
Note: Please make sure to paste only the shop/store name instead of the full URL.
- Access token: Fill in the token retrieved at step 1 no.10 - Click the “Submit” button below to complete the data connection.
It can take up to one working day for your data to arrive.
