Before you begin
To dismiss, edit, or switch alarms on/off, you must at least have View & edit permissions for the Workspace.
How do the alarms work?
To start-out your Adriel experience, we equip each dashboard with the following alarms:
-
Low CTR
-
High CPC
-
High CPV
-
Reduction in Impressions
-
Fall in Spending
-
Overspending
-
High / Increase in CPA
-
Reduction / Fall in ROAS
-
High ad frequency
-
Reduction in Events
-
Campaign without impressions
-
Ad sets without impressions
-
Ads without impressions
-
Disabled ad account
-
Pixel: add_to_cart
-
Pixel: initiate_checkout
-
Pixel: purchase
-
Pixel: complete_registration
If any of the conditions are met, the alarms will appear on the Dashboard overview.

If no alarms have been triggered, this section will be empty.

Alarm actions
-
Click on an alarm to view its details in the panel on the right.
-
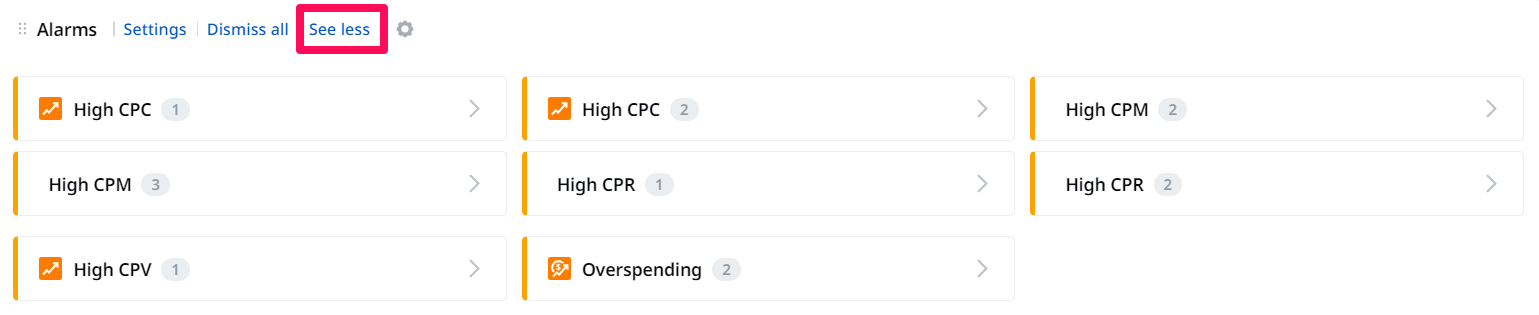
To dismiss all alarms in the Alarms area, click the Dismiss all button.
-
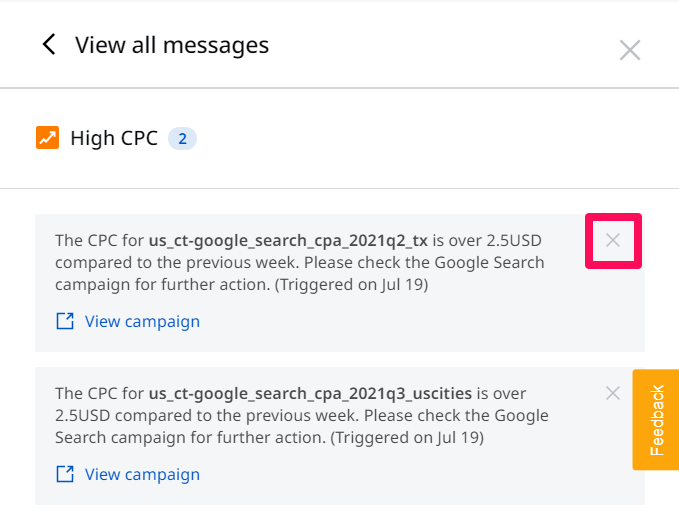
To dismiss an alarm, click the alarm box to open its panel, then click the X button on the alarm block.


How to check alarm messages
-
Click any alarm on the widget.
-
When the panel opens, you can view the channels and the list of campaigns on the basis of which the alarm can be triggered.
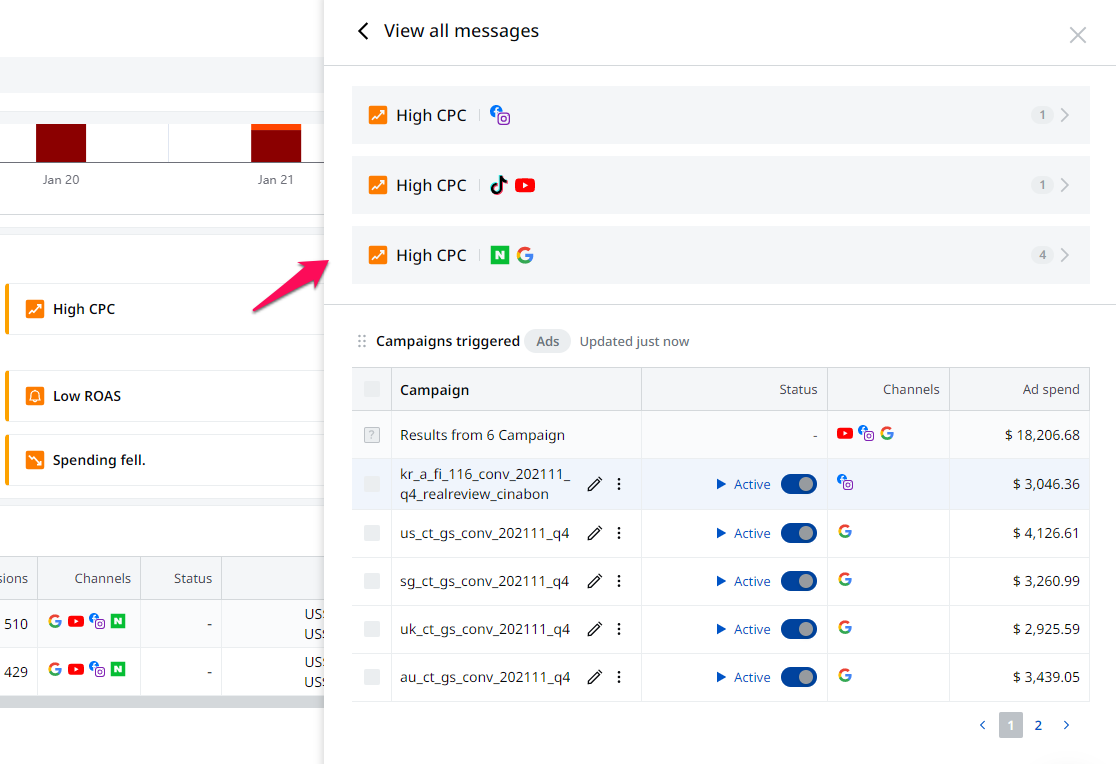
3. Click one of the boxes to view all messages. Then the panel for more messages will open like in the image below.
Note:
-
In order to use alarms, at least one campaign must be active.
-
Alarms are automatically dismissed in the next day/week/month based on the set period.
-
Alarm alerts for the previous day are removed every day, even if there are no new alarms.
-
Alarm alerts for weekly alarms are removed every Monday.
-
Alarm alerts for monthly alarms are removed on the 1st of the month.
-
When there are more than 3 alarms, the "See more" button appears on the widget.
Viewing and editing alarm settings
You can customize alarms to proactively monitor your campaigns according to your KPIs.
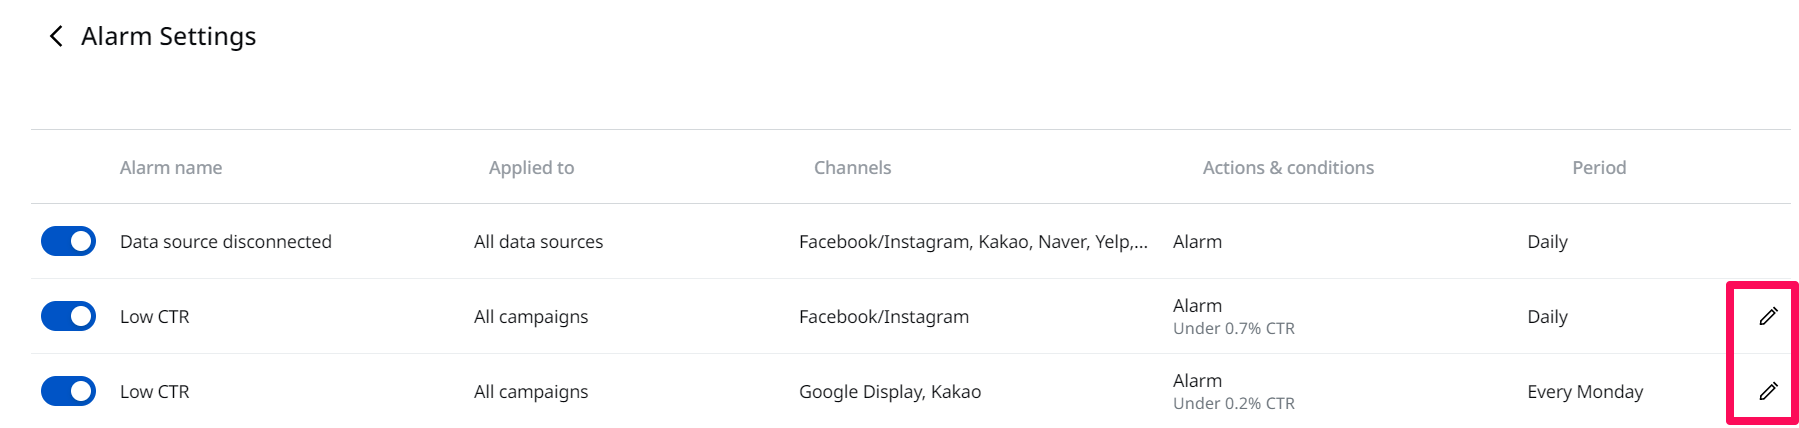
1. Next to Alarms, click Settings. It will redirect you to the Customizable Alarm page.

2. You can activate or deactivate the alarms in the list.
3. To edit an alarm, simply click the edit icon to the right of the alarm you wish to edit. This will activate the edit panel, where you can modify the following settings:
-
Status: You can turn an alarm on or off. If an alarm is turned off, you will not receive an alert, even if the set conditions are met.
-
Value: You can customize the value of the selected indicator.
-
Period: You can choose when to receive the alarm.
4. Click on the pencil icon on the left. You can edit its alarm condition on a new panel.
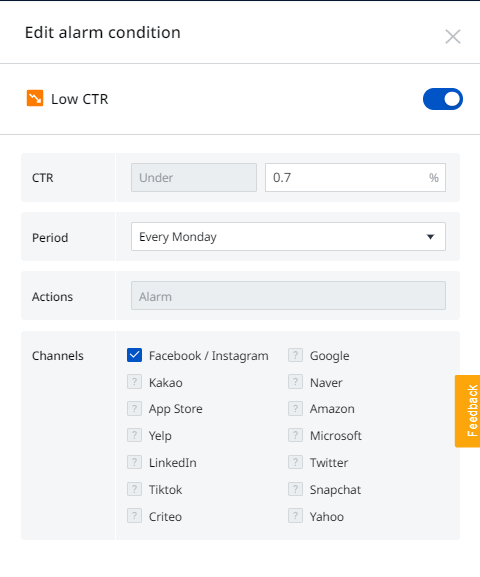
5. Click Update to apply your changes.